Step-by-Step Guide: Building Your First Raspberry Pi Project

Introduction to Raspberry Pi
Welcome to the fascinating world of Raspberry Pi! If you've been curious about tinkering with electronics and want to dive into the world of do-it-yourself (DIY) projects, then you're in the right place. Raspberry Pi is a small, affordable computer that offers endless possibilities for creating your own unique projects. Whether you're a complete beginner or have some experience with electronics, this step-by-step guide will help you build your first Raspberry Pi project from start to finish.
Project ideas for beginners
Before we get into the nitty-gritty of building your first Raspberry Pi project, let's explore some exciting project ideas that are perfect for beginners. These projects will introduce you to the basic functionalities and capabilities of Raspberry Pi, giving you a solid foundation to build upon.
- Simple Weather Station: Create a weather station that displays real-time weather data using a Raspberry Pi and some sensors.
- Home Automation System: Build a system that allows you to control your lights, appliances, and other devices remotely using Raspberry Pi.
- Media Center: Transform your Raspberry Pi into a media center that can stream movies, music, and TV shows.
- Smart Mirror: Craft a futuristic smart mirror that displays time, weather, and other information while also functioning as a regular mirror.
- Game Console: Turn your Raspberry Pi into a retro game console and relive the nostalgia of classic video games.
Step-by-step tutorial
Now that you have some project ideas, let's dive into the step-by-step process of building your first Raspberry Pi project. Follow these instructions carefully, and you'll have your very own functioning project in no time.
1. Gather the necessary components
Before you can start building, you'll need to gather all the necessary components for your specific project. This may include a Raspberry Pi board, a power supply, an SD card, sensors, LEDs, and other electronic components. Refer to the project documentation or online tutorials for a detailed list of required components.
2. Set up your Raspberry Pi
The next step is to set up your Raspberry Pi computer. Start by inserting the SD card with the operating system into the Pi's SD card slot. Connect the power supply to the Pi to turn it on. Follow the on-screen instructions to complete the initial setup.
3. Install the necessary software
Once your Raspberry Pi is up and running, you'll need to install the necessary software to control your project. This may involve downloading and installing specific libraries or programming languages that are compatible with your project requirements. Again, refer to the project documentation for detailed instructions.
4. Connect the electronic components
Now it's time to connect the various electronic components to your Raspberry Pi. This may include connecting sensors, LEDs, buttons, or any other components required by your project. Follow the wiring diagram or instructions provided with your project to ensure correct connections.
5. Write the code
After setting up the hardware, you'll need to write the code that controls your project. This may involve programming in languages like Python, JavaScript, or C++. Depending on your level of expertise, you can either write the code from scratch or modify existing code snippets available online. Remember to test your code for any errors or bugs.
6. Test and troubleshoot
Once the hardware and software are ready, it's time to test your project. Check if all the components are functioning correctly and ensure that the code is working as expected. If you encounter any issues or unexpected behavior, refer to the troubleshooting section in the project documentation or seek help from online forums and communities.
7. Document your project
Finally, don't forget to document your project. Take pictures, write down the steps involved, and create a project log detailing your journey. This will not only help you remember the process but also allow you to share your knowledge and experiences with others.
DIY electronics
Building Raspberry Pi projects is an excellent way to dive into the world of DIY electronics. While some projects may seem intimidating at first, with the right guidance and resources, anyone can learn to create their own electronic devices.
DIY electronics offer a unique opportunity to explore your creativity, enhance problem-solving skills, and gain a deeper understanding of how electronic devices work. Raspberry Pi, with its affordability and versatility, has made DIY electronics more accessible than ever before.
Whether you're interested in home automation, robotics, IoT (Internet of Things), or simply want to create something cool, Raspberry Pi projects provide a platform for endless possibilities. With a little patience and persistence, you'll be amazed at what you can achieve.
Raspberry Pi projects
Now that you have a grasp of the basics, let's dive into some exciting Raspberry Pi projects that you can tackle as a beginner.
1. Retro Gaming Console
Turn your Raspberry Pi into a retro gaming console and relive the nostalgia of classic video games. With the help of emulators and a user-friendly interface, you can play games from various gaming consoles, including NES, Sega Genesis, and PlayStation.
This project requires a Raspberry Pi board, a compatible operating system, a game controller, and an HDMI display. Follow the step-by-step instructions provided in tutorials available online to set up and configure your gaming console.
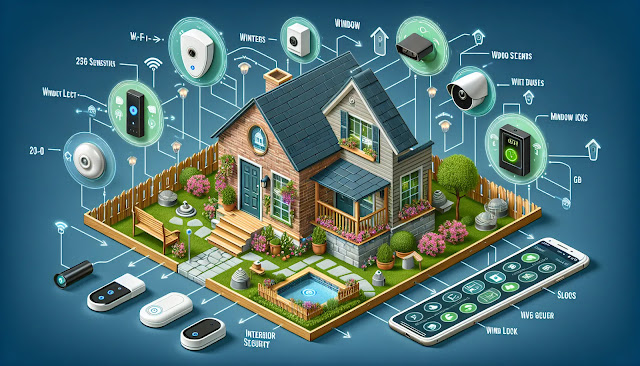
2. Smart Home Automation
Bring automation to your home by creating a smart home system using Raspberry Pi. With this project, you can control lights, appliances, security systems, and more using a single interface.
Required components include Raspberry Pi, relay modules, sensors, and a home automation software package like OpenHAB or Home Assistant. Install the necessary software, connect the components, and follow the configuration steps to automate your home. You can even integrate voice control using platforms like Amazon Alexa or Google Assistant.
3. Weather Station
Set up a weather station that provides you with real-time weather updates using Raspberry Pi and weather sensors. This project is a great way to learn about data collection, visualization, and basic meteorology.
You'll need a Raspberry Pi, a weather sensor module (such as the DHT11 or BMP180), and an LCD display to showcase the weather information. By writing code to fetch data from the sensor and display it on the LCD, you can create your own personalized weather station.
4. Voice-controlled Assistant
Create your own voice-controlled assistant, similar to Amazon's Alexa or Apple's Siri, using Raspberry Pi and voice recognition software like Jasper or Mycroft.
This project involves setting up a Raspberry Pi with a microphone, speakers, and the necessary software. You'll then train the assistant to respond to specific voice commands and perform various tasks, such as playing music, providing weather updates, or controlling home automation devices.
5. Home Security System
Enhance the security of your home by building a DIY home security system with Raspberry Pi. Monitor your home using surveillance cameras, receive alerts for any suspicious activity, and remotely control the system.
You'll need a Raspberry Pi, a camera module, motion sensors, and a software package like MotionEye or ZoneMinder. Follow the installation and configuration steps provided in tutorials to set up your own robust home security system.
These projects only scratch the surface of what you can achieve with a Raspberry Pi. The key is to start small, learn as you go, and gradually challenge yourself with more complex projects. Remember, the journey is just as rewarding as the end result, so embrace the process and have fun exploring the world of Raspberry Pi.